
Git is an Open Source Distributed Version Control System. The code which is stored in Git keeps changing as more code is added. Also, many users can add code in parallel. So Version Control System helps in handling this by maintaining a history of what changes have happened. Git has a remote repository which is stored in a server and a local repository which is stored in the computer of each user. This means that the code is not just stored in a central server, but the full copy of the code is present in all the users’ computers.
Why do you need a Version Control System like Git?
- Research projects generally have multiple users working in parallel. So a version control system like Git is needed to ensure there are no code conflicts between the users.
- Additionally, the requirements in such projects change often. So a version control system allows developers to revert and go back to an older version of the code.
Git setup.
Open a terminal and run the following commands:
git config --global user.name "your_username"
git config --global user.email "your_email"
The user name and email will be associated with your subsequent Git activity, which means that any changes pushed to GitHub, BitBucket, GitLab or another Git host server will include this information.
You can change the way Git recognizes and encodes line endings using the core.autocrlf command to git config. The following settings are recommended on GNU/Linux:
git config --global core.autocrlf input
The commands we just ran above only need to be run once: the flag --global tells Git to use the settings for every project in your user account. You can check your settings at any time:
git config --list
Create a local repository from JupyterLab.
Once the JupyterLab Git extension is properly installed, a tab labeled "Git" as well as "Git panel" will be available from the JupyterLab interface.
Opening the Git tab will return the following message:
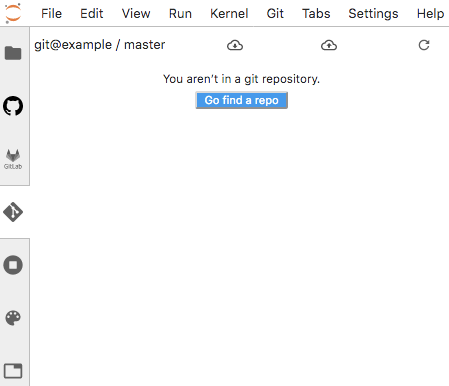
This means that a Git repository has not been created yet in the working folder. You can either open an existing folder containing your project or create a new one for your project. In case you create a new folder, move all the files/data you wish to belong to the Git repository (you can use your mouse and move files in the Folder or use the command line in a Terminal).
Once you are in the working folder click on the Git Tab and select Init.
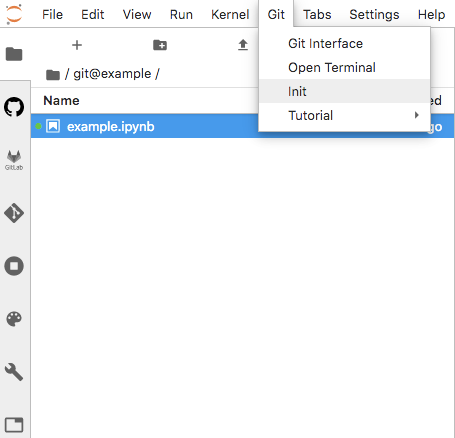
Alternatively, you can execute the following command in a terminal:
git init
A window will pop-up, aksing for confirmation. Select YES.
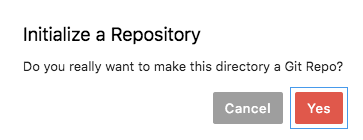
Executing git init creates a .git subdirectory in the current working directory, which contains all of the necessary Git metadata for the new repository.
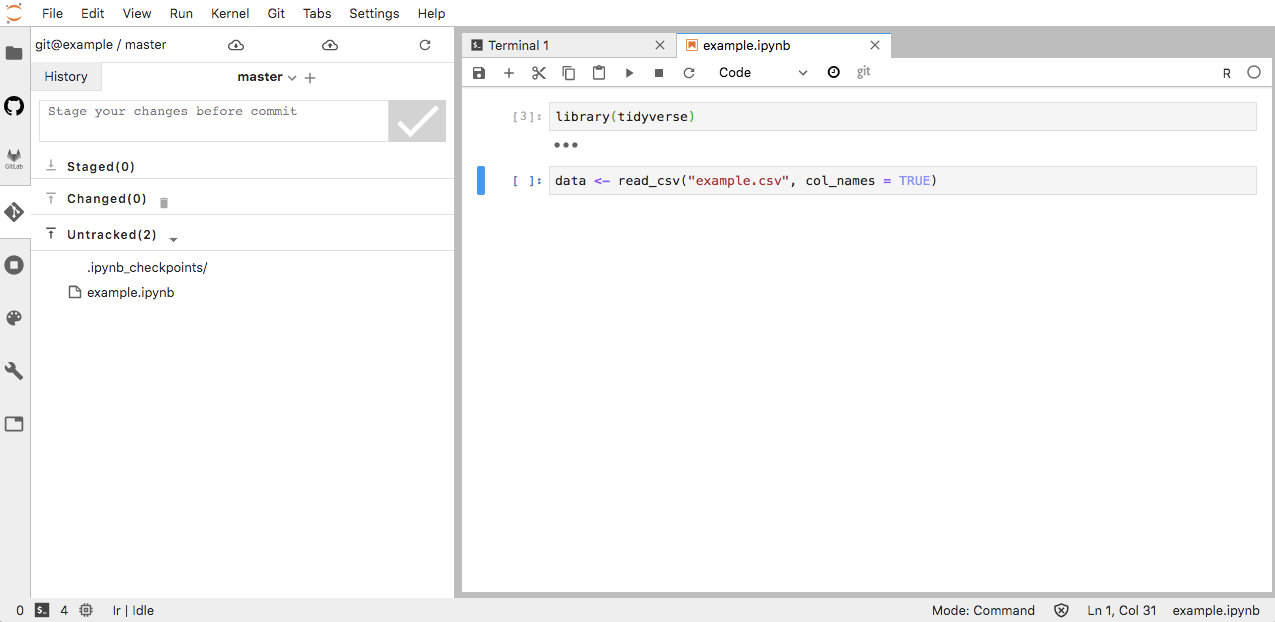
Add your research work in your newly created repository by clicking on the "Git Icon" (on the left hand side of the JupyterLab panel) as shown on the figure below:
If you are familiar with Git, you will recognize the interface and steps we use for staging and committing files into git.
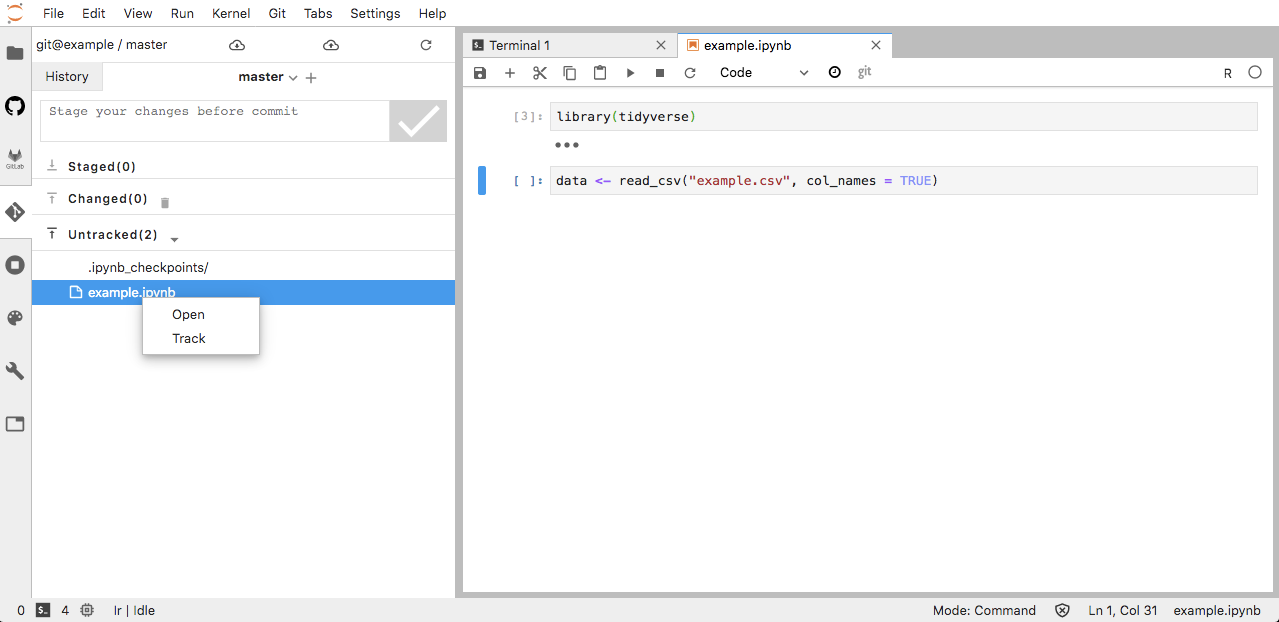
Right-click on the file example.ipynb and click "Track" to track the file as shown on the figure above.
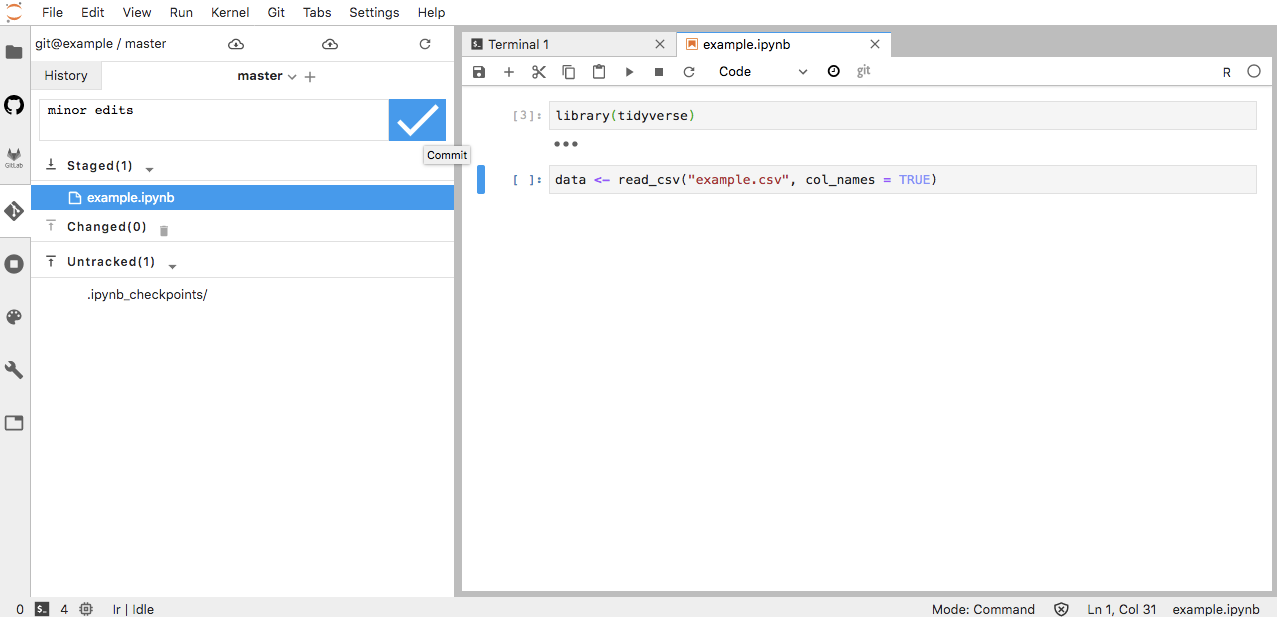
In a Text box, add an Input message to commit staged changes; for instance "minor edits"
Then commit by click on the "commit" sign as shown in the figure below:
A file is tracked if it is under version control, i.e. it was once added and committed.
You are done! However, make sure you stage and commit your notebooks and related research work every time you make changes and are willing to keep track of these changes!
When to commit.
You should make a commit when you complete a unit of work or have changes you may want to undo. For example, if you have changes you may want to undo and changes that completed a unit of work, you should make two commits: one containing the changes you may want to undo and one containing the changes that complete the work.
Making commits every x number of minutes, hours, or days is ridiculous and would never result in a version history that provides any value outside of a chronicling system.
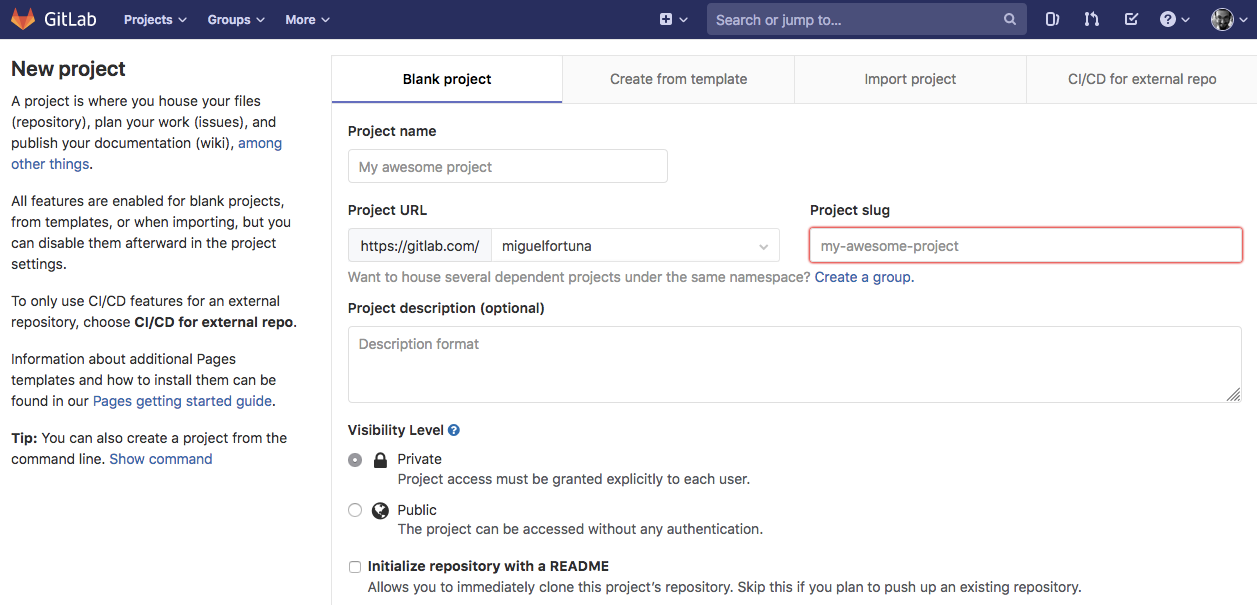
Create a remote repository in GitLab.
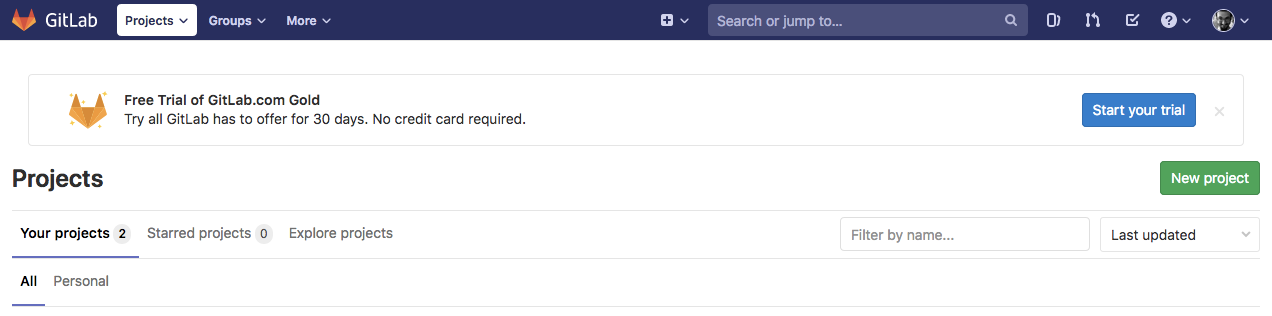
Click on New project as shown below:
Add a repository name, description, and do not not check the Initialize repository with a README option (we will add it afterwards).
Click the green Create project button.
Link your local repository to GitLab.
Once you have a remote repository setup, you will need to add the remote repository URL to your local Git config:
git remote add origin https://gitlab.com/username/repository_name.git
Once you have mapped the remote repository, you can push your local repository to the remote repository:
git push -u origin master
If the remote repository is not empty, the above command will not work, then you need to do:
git pull --rebase origin master
git push -u origin master
Always pull before pushing because if someone have pushed changes to the server after your last pull, your local copy and the current server copy would not in sync. Pulling will merge the remote copy with your local one, which brings them back into sync and allows you to push.
Authenticate to the GitLab remote server.
Git is a distributed version control system, which means you can work locally but you can also share or "push" your changes to other servers. Before you can push your changes to a GitLab server you need a secure communication channel for sharing information.
The SSH protocol provides this security and allows you to authenticate to the GitLab remote server without supplying your username or password each time.
Generating a new SSH key pair.
Open a terminal.Generate a new RSA SSH key pair:
ssh-keygen -t rsa -b 4096 -C "[email protected]"
Enter file in which to save the key (/home/username/.ssh/id_rsa):
Click ENTER.
Created directory '/home/username/.ssh'.
Enter passphrase (empty for no passphrase):
Enter a passphrase you will need to remember later on.
Enter same passphrase again:
Enter the passphrase again.
Your identification has been saved in /home/username/.ssh/id_rsa.
Your public key has been saved in /home/username/.ssh/id_rsa.pub.
Adding an SSH key to your GitLab account.
Copy your public SSH key stored in the file /home/username/.ssh/id_rsa.pub:
cat /home/username/.ssh/id_rsa.pub
Select and copy the entire key starting with ssh-rsa and ending with your email.
Click your avatar in the upper right corner of GiLab and select Settings.
Navigate to SSH Keys and paste your public key in the Key field. Since you created the key pair with a comment (you used -C "[email protected]"), your email will appear in the Title field.
Click the Add key button.
Testing that everything is set up correctly.
To test whether your SSH key was added correctly, run the following command in your terminal:
ssh -T [email protected]
The first time you connect to GitLab via SSH, you will be asked to verify the authenticity of the GitLab host you are connecting to. For example, when connecting to GitLab.com, answer yes to add GitLab.com to the list of trusted hosts:
The authenticity of host 'gitlab.com (xxx.xxx.xxx.xxx)' can't be established.ECDSA key fingerprint is SHA256:HbW3g8zUjNSksFbqTiUWPWg2Bq1x8xdGUrliXFzSnUw.
Are you sure you want to continue connecting (yes/no)? yes
Warning: Permanently added 'gitlab.com' (ECDSA) to the list of known hosts.
Once added to the list of known hosts, you won’t be asked to validate the authenticity of GitLab’s host again. Run the above command once more, and you should only receive a Welcome to GitLab, @username! message.
Using Git without extra passphrase prompts.
Open a terminal.
Start ssh-agent:
eval `ssh-agent -s`
Add your private key using ssh-add:
ssh-add ~/.ssh/id_rsa
Check if the key is added (parameter is a lowercase L):
ssh-add -l
Getting the JupyterLab interface to work for the push/pull cloud icons.
Run:
ssh-keygen -p
This will allow you to remove the passphrase set on the key. If no passphrase is set, it's stored in clear text, and you can use it without unlocking it:
Enter file in which the key is (/home/user/.ssh/id_rsa):
Enter old passphrase:
Key has comment ''
Enter new passphrase (empty for no passphrase):
Enter same passphrase again:
Your identification has been saved with the new passphrase.
Simply press enter when prompted for passphrase to set no passphrase. After that, you can use your key freely.
You might also need to enable terminal prompts (run the command in your terminal):
git config --global url."[email protected]:".insteadOf "https://gitlab.com/"